On Airbnb, competition for guests is fierce, so your listing's visual appeal is paramount. High-quality photos are more than just eye candy; they are the cornerstone of a successful listing. They serve as the virtual window to your property, captivating potential guests and inspiring them to book their stay.
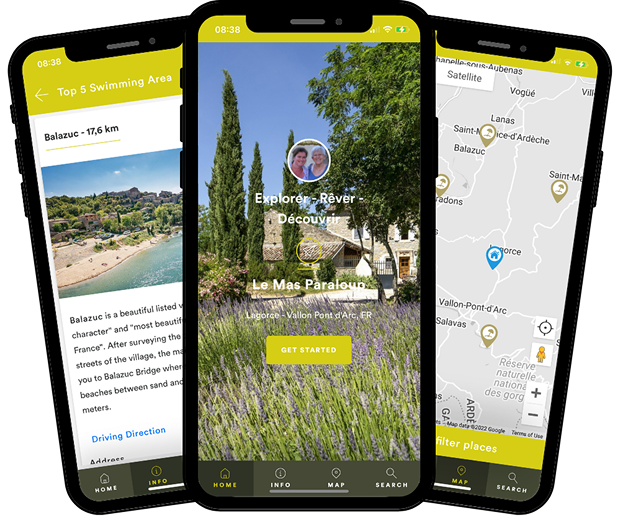
Enhance the Airbnb guest experience by pairing high-quality photos with a digital guidebook that provides valuable information and enhances their stay.
This comprehensive guide will equip you with the knowledge and techniques to capture stunning Airbnb photos that showcase your space in the best possible light, attracting discerning travellers and maximising your booking potential.
Read on to discover:
- The importance of professional photos for your Airbnb listing
- Preparing your space for photography
- Essential equipment for taking professional photos
- Mastering photography techniques
- Hiring a professional photographer vs. DIY
- Showcasing your photos effectively on Airbnb
The importance of professional photos for your Airbnb listing
In the competitive landscape of the short-term rental market, where travellers are inundated with countless options, your Airbnb listing needs to stand out. High-quality photos are not merely an aesthetic enhancement; they are a strategic investment that directly impacts your success.
- First Impressions: High-quality photos are crucial for attracting guests on platforms like Airbnb. Stunning visuals create excitement and encourage further exploration of your listing.
- Visual Storytelling: Professional photos go beyond showcasing your property; they tell a compelling story, evoking emotions and highlighting its unique character.
- Boosting Search Visibility: Listings with professional photos rank higher in search results, increasing visibility and attracting more bookings.
- Building Trust: High-quality photos provide an accurate representation of your property, building trust with guests and reducing the risk of disappointment.
- Showcasing Unique Features: Professional photography effectively highlights your property's unique selling points, enticing guests to choose your listing.
By investing in professional-quality photos, you're not just enhancing the visual appeal of your listing; you're making a strategic investment in your rental business.
According to a study by Airbnb, listings with professional photography earned 28% more bookings, could charge a 26% higher nightly rate, and increased overall earnings by 40%!
Download your FREE Airbnb Photography Checklist!
Preparing your space for photography
Before you start snapping photos, it's crucial to prepare your space to create an inviting and visually appealing atmosphere. This involves a meticulous approach that goes beyond a simple tidy-up.
Clean thoroughly
- Impeccable presentation: a clean and tidy space is paramount for professional-looking photos. Potential guests will scrutinise every detail, from countertops and floors to the cleanliness of bathrooms and bedrooms.
- Deep cleaning: go beyond a quick surface clean. Deep clean all areas, paying attention to often-overlooked spots like light switches, baseboards, and the inside of appliances.
- Declutter strategically: remove any personal belongings, excess knick-knacks, and unnecessary items that might distract from the overall aesthetic. Decluttering creates a sense of spaciousness and allows the focus to remain on the key features of your property.
- Attention to detail: don't forget those small but impactful details. Make sure beds are neatly made, towels are folded, and that any visible surfaces are free from dust and smudges.
Stage your property
- Optimise space and functionality: arrange furniture strategically to maximise space and functionality. Create inviting conversation areas in living rooms and ensure bedrooms have a clear designated sleeping space.
- Highlight key features: position furniture to showcase key features, such as a fireplace, a stunning view, or a spacious balcony.
- Add touches of personality: introduce tasteful decorations to add warmth and personality to your space. Fresh flowers, colourful throw pillows, and artwork can instantly elevate the ambiance.
- Create a welcoming atmosphere: make sure your space feels inviting and comfortable. Consider adding cosy blankets, plush rugs, and decorative accents that enhance the overall appeal.
Optimise lighting
- Embrace natural light: natural light is the most flattering and cost-effective way to illuminate your space. Schedule your photoshoot for a time of day when your property receives ample natural light.
- Maximise natural light: open curtains and blinds to allow maximum natural light to flood the rooms.
- Control harsh shadows: use sheer curtains or blinds to diffuse direct sunlight and minimise harsh shadows.
- Artificial lighting solutions: if natural light is limited, strategically use artificial lighting. Opt for warm-toned bulbs that create a warm and inviting ambiance. Avoid harsh overhead lighting, which can create unflattering shadows and a cold atmosphere. Consider using floor lamps, table lamps, and string lights to create a warm and inviting glow.
Highlight key features and amenities
- Identify unique selling points: carefully consider the unique features and amenities that make your property stand out. Does it boast a stunning view, a gourmet kitchen, a private patio, or a hot tub?
- Showcase key features: dedicate specific photos to highlighting these key features. For example, capture the breathtaking view from your balcony, the luxurious bathroom with a soaking tub, or the fully equipped kitchen with top-of-the-line appliances.
- Don't forget the amenities: ensure all amenities are clearly visible in your photos. This includes items such as high-speed Wi-Fi, a smart TV, a washer and dryer, and any other features that enhance the guest experience.
Essential equipment for taking professional photos
The quality of your photos significantly impacts your listing's appeal. Investing in the right equipment can make a significant difference in the final results.
Choosing the right camera
- DSLR vs. smartphone: while DSLR cameras offer superior image quality, control, and flexibility, they can be a significant investment. Modern smartphones, equipped with high-resolution cameras and advanced features, can produce impressive results, making them a viable option for many hosts.
- Consider your budget and expertise: if you're new to photography, a smartphone may be a more user-friendly and cost-effective starting point. However, if you're serious about professional-quality photos, investing in a DSLR camera may be worthwhile.
- High-resolution is key: regardless of your camera choice, ensure it can capture high-resolution images (ideally 16 megapixels or higher). High-resolution images are essential for creating sharp, clear photos that maintain their quality even when zoomed in or printed.
Utilising a tripod
- Stability and consistency: a tripod is an invaluable tool for achieving stability and consistency in your photos. It helps to minimise camera shake, especially when using longer shutter speeds or telephoto lenses.
- Perfecting composition: a tripod allows you to meticulously frame your shots, ensuring that lines are straight, horizons are level, and the overall composition is balanced and aesthetically pleasing.
- Consistent framing: when shooting multiple photos of the same room or area, a tripod helps maintain consistent framing, creating a more professional and polished look.
Using wide-angle lenses
- Maximising space: wide-angle lenses are particularly useful for showcasing the size and spaciousness of rooms. They can make small spaces appear larger and more inviting.
- Selecting the right lens: consider using a wide-angle lens with a focal length between 10mm and 24mm for optimal results.
- Avoiding distortion: be mindful of potential distortion, especially when shooting close to walls or corners.
- Experimentation: experiment with different focal lengths to find the best perspective for each room.
Additional accessories
- Remote shutters: remote shutters allow you to trigger the camera without touching it, minimising camera shake and ensuring sharper images.
- Reflectors and diffusers: reflectors and diffusers can help you control lighting, fill in shadows, and create a more balanced exposure. Reflectors bounce light back into the scene, while diffusers soften harsh light.
Mastering photography techniques
Composition and framing
- Rule of thirds: divide the image into nine equal parts with two horizontal and two vertical lines. Placing key elements along these lines or at their intersections creates a more visually appealing and balanced composition.
- Leading lines: utilise natural lines within your space, such as pathways, walls, or furniture, to guide the viewer's eye through the photo.
- Framing with elements: use doorways, windows, or archways to frame specific areas within your space, adding depth and visual interest.
Capturing different angles
- Multiple perspectives: shoot from various angles to provide a comprehensive view of your space. Experiment with high angles, low angles, and corner shots to showcase different perspectives.
- Room-specific angles:
- Living rooms:
- Capture the overall space with a wide-angle shot.
- Showcase cosy seating arrangements with close-up shots.
- Highlight unique architectural features like fireplaces or exposed brick.
- Bedrooms:
- Shoot straight-on to showcase the bed and overall layout.
- Capture the view from the bed to highlight any scenic views.
- Detail shots of luxurious bedding and unique décor.
- Bathrooms:
- Emphasise cleanliness and luxury with close-up shots of sparkling fixtures, countertops, and showers.
- Showcase unique features like soaking tubs or walk-in showers.
- Kitchens:
- Capture the overall layout with a wide-angle shot.
- Detail shots of countertops, appliances, and unique features like a breakfast bar or a wine rack.
- Highlight natural light and any scenic views from the kitchen window.
- Living rooms:
Leveraging natural light
- The importance of natural light: natural light is the most flattering and cost-effective way to illuminate your space. It creates a warm and inviting atmosphere, adding depth and dimension to your photos.
- Optimal lighting conditions:
- Schedule your photoshoot during the "golden hour" (shortly after sunrise or before sunset) for soft, warm light.
- Overcast days can also provide excellent lighting conditions, as the clouds diffuse the sunlight, creating a soft and even light.
- Maximising natural light:
- Open curtains and blinds to allow maximum natural light to flood the rooms.
- Use sheer curtains or blinds to diffuse direct sunlight and minimise harsh shadows.
- Positioning for optimal light: position furniture and objects to maximise the use of natural light. For example, place a chair near a window to showcase the natural light and the view.
Editing and post-processing
- Basic editing techniques:
- Enhance brightness and contrast to ensure your photos are well-exposed.
- Adjust white balance to correct colour casts and ensure accurate colour representation.
- Crop and straighten images to improve composition.
- Recommended editing software:
- Adobe Lightroom: a powerful and user-friendly tool for editing and organising photos.
- Adobe Photoshop: offers advanced editing capabilities for more complex adjustments.
- Mobile apps: explore user-friendly mobile apps like Snapseed, VSCO, and Lightroom Mobile for basic editing and quick adjustments.
- Professional editing services:
- Consider professional editing services to enhance the quality of your photos.
- Professional editors can correct colour, adjust lighting, and enhance details to create truly stunning images.
- Research reputable editing services and compare pricing and services before making a decision.
Hiring a professional photographer vs. DIY
The decision to hire a professional photographer or take photos yourself depends on your budget, your photography skills, and the desired level of professionalism.
| Options | Pros | Cons |
| Hiring a professional photographer |
|
|
| DIY photography |
|
|
- Hiring a professional photographer:
- Benefits:
- Expertise in lighting, composition, and post-processing.
- High-quality images that showcase your property in the best possible light.
- Time-saving and stress-free experience.
- Considerations:
- Can be more expensive than DIY.
- Requires scheduling and coordination with the photographer.
- Benefits:
- DIY photography:
- Benefits:
- Cost-effective option.
- Greater control over the process.
- Flexibility to schedule photoshoots at your convenience.
- Considerations:
- Requires time, effort, and photography skills.
- May require investing in photography equipment.
- Benefits:
Showcasing your photos effectively on Airbnb
Selecting the best cover photo:
- The cover photo is the first thing potential guests see, so choose wisely.
- Select a photo that immediately grabs attention and accurately represents the overall appeal of your property.
- Consider showcasing a key feature, such as a stunning view, a spacious living room, or a luxurious bathroom.
Organising photo order for maximum impact
- Tell a story: sequence your photos to guide guests through the space, starting with the most inviting and visually appealing rooms.
- Room variety: include a variety of photos showcasing different rooms and perspectives.
- Highlight key features: ensure all key features and amenities are prominently featured in the photo lineup.
Writing compelling captions and descriptions
- Use captions to provide additional context and highlight specific features of each photo.
- For example, "Enjoy breathtaking sunsets from this private balcony" or "Relax in the luxurious soaking tub after a long day of exploring."
- Incorporate relevant keywords (e.g., "stunning views," "fully equipped kitchen," "pet-friendly") to improve search engine visibility and attract the right guests.
Discover more about the ultimate Airbnb host checklist.
Final thoughts
Investing time and effort in professional-quality Airbnb photos is crucial for attracting guests and maximising your booking potential. By following the tips and techniques outlined in this guide, you can create a visually stunning listing that stands out from the competition and entices travelers to book their stay.
Remember that continuous improvement is key. Regularly review your photos, gather guest feedback, and adapt your photography strategy based on the latest trends and best practices.
Ready to streamline your Airbnb hosting and enhance the guest experience?
A Touch Stay digital guidebook can save you time and effort while providing guests with valuable information.

Ned
Ned has clocked up over 11 years in digital marketing and comms, with a strong focus on creating engaging content for a range of brands and agencies. When he’s not writing, he can be found digging for records, peering through his telescope at the night sky, or onboard his local lifeboat where he volunteers as a crewmember.
Be the first to know!
Join our newsletter for early access to:
- ✅ Free guides
- ✅ Pro tips & tricks
- ✅ Time saving tutorials
- ✅ Latest blog posts
- ✅ Checklists & templates


