

Summarize in
Whether you’re planning an industry conference, a vendor showcase, a tradeshow, or a company retreat, you’ve likely got too many things to do and not enough time to do them. A last-minute panic about a schedule change, or dozens of attendees emailing you to ask about parking, is the last thing you need.
So, how do you avoid it? Two words: purposeful communication via an event app.
Serve event attendees, exhibitors, and organizers everything they need to know in an intuitive, accessible resource, and save yourself hours of time.
If you’re an event organizer with too much on your plate, you’ve come to the right spot. Read on to discover how to build a cost-effective, interactive event app (no coding required!) that creates an excellent user experience and informs attendees of pertinent details before, during and after the event.
We’ll cover:
- How an event planning app helps you
- What to include in your digital event guide
- How to share your event app with attendees
The benefits of a digital event app
A digital event app synthesises your event communication materials so your attendees have all the info they need on their mobile device.
Of course, many event organisers still choose to communicate via other channels, such as email and push notifications via social media. A digital event guide simply complements these materials by collating the information, and reducing the volume of incoming and outgoing communications for event management providers.
Plus, if attendees have any queries or questions, they don’t have to dig through their inbox for the eventbrite confirmation, hunt through your website, or email you looking for the answer. They simply open their mobile app and find it themselves in a matter of seconds. Better for them, and better for you!
There are a few more reasons why a digital event app beats reams of printed materials and dozens of lengthy emails:
- Clearly present everything attendees, exhibitors, and even other organisers need to know, in one place
- Instantly update information when things change (as they so often do!)
- Serve your event guide to attendees multiple times before they even arrive
- Promote attendee engagement and live streams during your event with unlimited notifications
- Survey attendees in real time with embedded live polls
- Cater to multilingual audiences
- Position your brand, front and centre
- Complement your event’s sustainability strategies
- Adhere to multiple types of phone needs, including ios and android
- Promote your event calendar for future events
A digital event guidebook is the modern answer to event communications. Save yourself time, while helping attendees get the most from your event.

How to create your digital event app
At Touch Stay, we’ve done the coding – no-code required on your part! Simply start your Touch Stay free trial to begin populating your guidebook with all the written content, pictures and videos that you think will be useful for attendees. Then, our software sprinkles some magic dust over it, and you get a polished, intuitive guidebook to share with attendees via a simple link.
Before you get started with this walkthrough, we recommend watching the video below to get a taste of the Touch Stay basics:
You can also check out this Getting Started article from Joe, our co-founder and product expert. It walks you through the very first things you need to do to get your guidebook up and running, and links to some useful support articles for your next steps.
If you’re feeling confident about the basics, let’s get started with our step-by-step guide to creating your own digital event app with Touch Stay.
1. Choose a guidebook template to edit
Touch Stay currently has seven guidebook templates for you to choose from:
- Event
- Short-term rental
- B&B/hotel
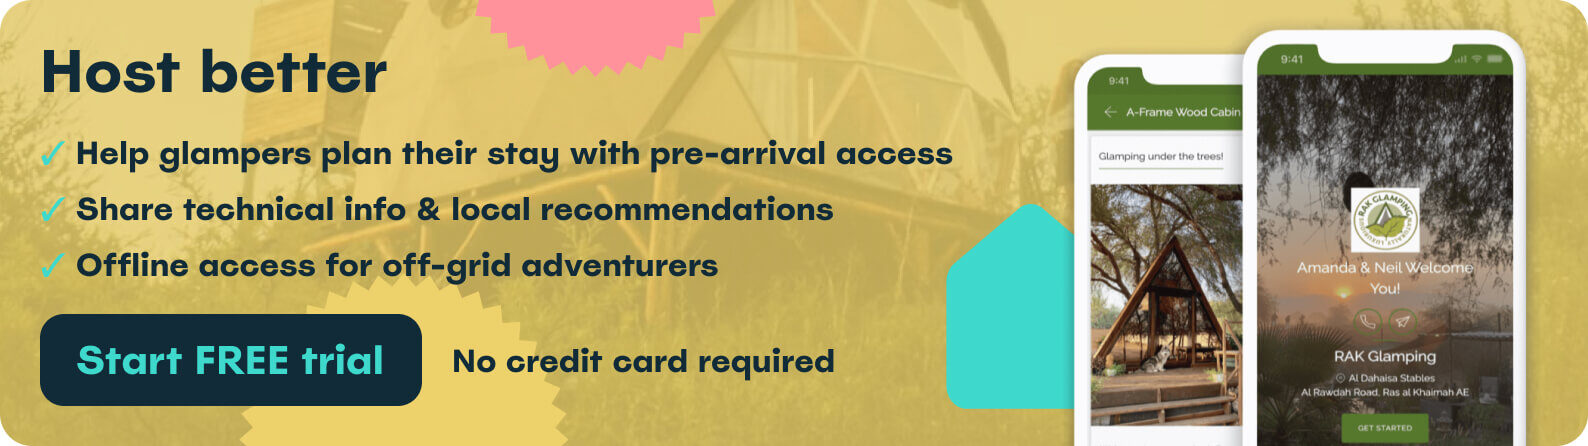
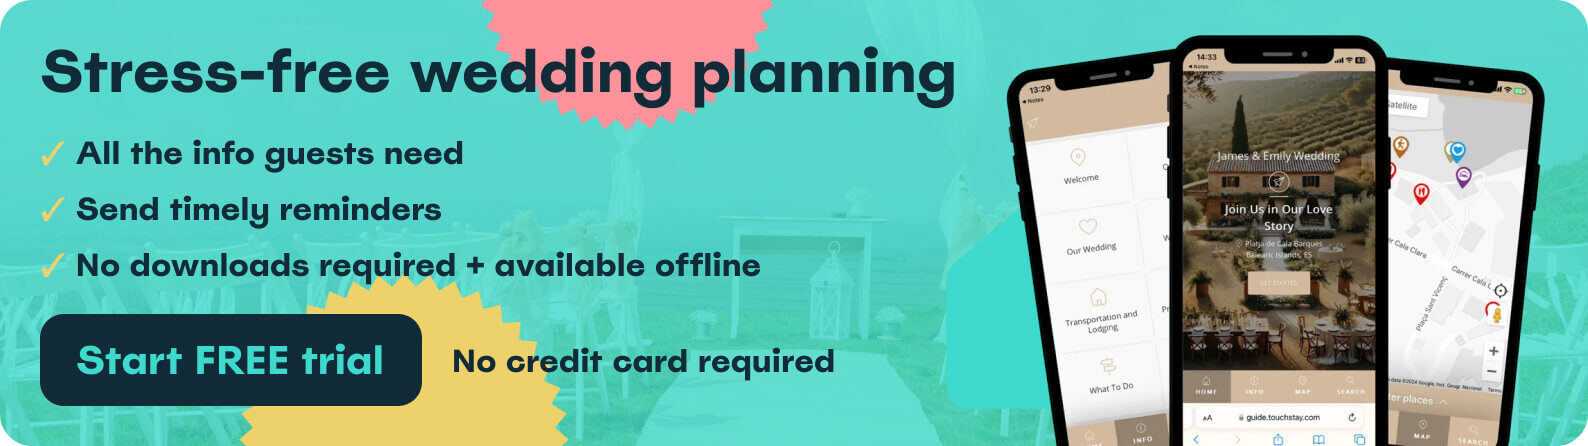
- Glamping
- Camping
- RV/motorhome
- Destination guide
All our guidebooks are completely customisable, so you can tweak any of them to meet all types of event planning needs. In this case, however, you can simply select the “Event” option. Then add:
- the name of your event
- the address of your event venue
- your name, email address, and password
And that’s your account all set up!
2. Add your event branding
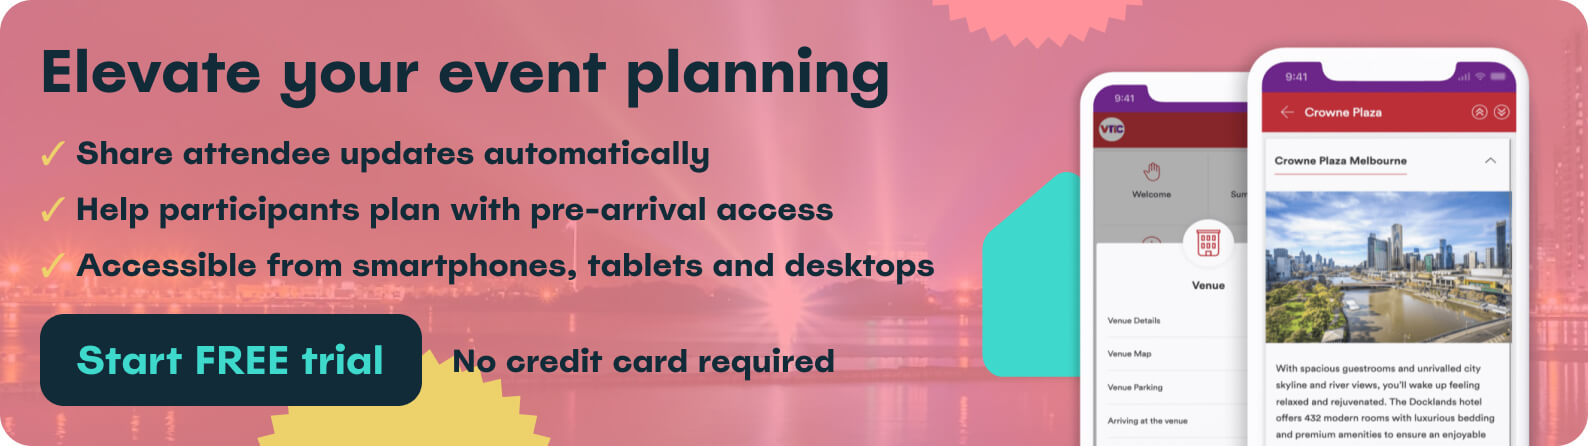
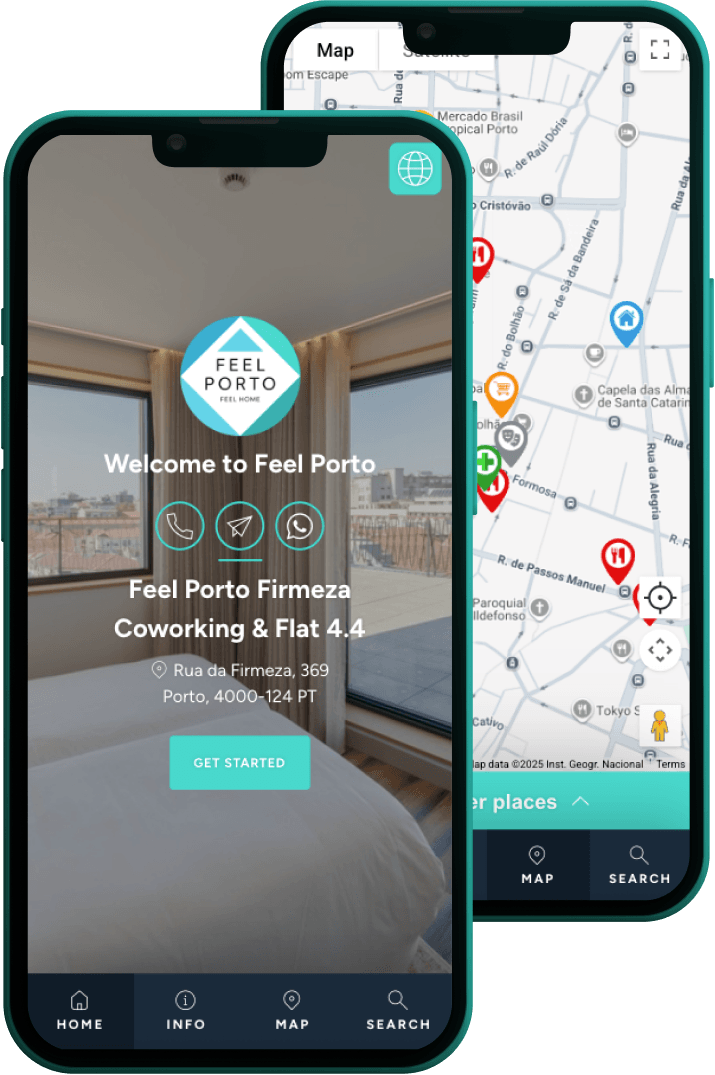
Head to the “Guides” tab in your account, and select the guide you just created. This will take you to the “Guide details” page of your conference app where the magic begins in creating a unique attendee experience and producing a professional event.
From here, you can edit your guide’s:
- Cover photo
- Cover details
- Address and location
- Colours and fonts
Make your guidebook a representation of your event. By adding your event logo, colours and fonts, plus a high quality cover image and custom greeting, your guidebook immediately becomes a polished event guide – before you’ve even added any information!

3. Welcome attendees to your event
Once you’ve framed your guidebook with a polished design, you can start adding the crucial content.
In the first section of your guide, welcome attendees to your event and give them a taste of what your event app can do for them.
You might include your event’s:
- Name
- Location
- Theme or focus
- Benefits
- A flavour of the details attendees will find in your own event app
This last point will persuade your visitors to keep delving further into your event app – they need to know exactly what’s in it for them.

4. Guide attendees through your registration process
Users can access your event app through a simple URL, doubling as a brilliant marketing tool for event planners in the process. Simply limit access to any sensitive information, and then paste the invitation link into your:
- Emails
- Website
- Social media posts
- Email footer
Potential attendees will follow the link to your custom event digital guidebook, answering all their logistical questions while showcasing all your event’s benefits. Of course they’ll want to attend!
First, you need to enable them to register for your event in a matter of clicks. The best way to do this is to include a category dedicated to registration details in your event app.
This section will outline the different types of tickets attendees can purchase, and exactly how they can register. Make sure to include:
- Ticket prices
- Deadlines for certain types of registration (e.g. early bird)
- Inclusions for each type of ticket
- Cancellation and refund policy
- A link to your registration form
Your aim is simple: to make it as clear and easy as possible for potential attendees to register.
5. Share your location information
The location details of your event are both a practical consideration and a strong marketing asset. If you’ve managed to nab the chicest venue in town, make sure attendees know! Once registered, providing your guests and app users with your venue information and location, will have them feeling cool, calm and collected upon arrival.
You can group all of the practical venue information your attendees need under one category. In here, you can customise whichever of the below topics are relevant to your event:
- Venue details – where is the event taking place? Is there anything you want to highlight about why you chose this venue?
- Lodging details – do you have a room block available for event attendees? Is it at the same venue as the event itself?
- Complimentary food & drink – does the cost of a ticket include any complimentary meals? If so, where and when are these happening?
- Parking availability – where can attendees park? What will it cost them?
- Organiser contact details – if attendees have any questions, how should they get in touch?
Touch Stay’s Google Places integration allows you to instantaneously import venue details – address, contact details, Google reviews – into your event guidebook. You can then add your own personal note to customise your venue and lodging information.
READ: How to add a Google Place to your guidebook

Encourage users to save your event app to their phone
Within this category, we recommend retaining a topic that’s present in all Touch Stay guidebook templates: “Add This Guide to Your Phone”. This topic clearly maps out how users can add your event guidebook to the home screen of their phone, offering easy access to it throughout the course of your event.
Add a weather forecast to your event app
We also suggest adding a subcategory dedicated to the weather. Giving your attendees a glimpse of the weather forecast helps them pack and plan their activities accordingly.
Touch Stay’s AccuWeather integration means you can add a weather widget which automatically displays the weather at your event location.
READ: How to add the weather widget
6. Help attendees connect to Wi-Fi
Now that you’ve helped your attendees get to the correct venue, park the car, and check into the hotel, it’s time for the really important bit: the Wi-Fi!
The good news is that each Touch Stay guidebook template contains a ready-made “WiFi/Internet Details” category. All you need to do is edit the topic to contain the Wi-Fi login details for your event venue. Then, drag and drop the category to wherever you’d like it to sit in your event app.
7. Encourage visitors to explore the local area
It’s likely that your attendees will have some downtime at some point during your event, particularly if it spans multiple days. They may want to use this time to grab a coffee, try a regional speciality for dinner, or experience some of the local sights. If you can recommend a few of your favourite spots, you’ll wave goodbye to attendees who can’t wait to return next year.
We recommend including 15-20 places visitors can grab:
- Coffee
- Post-event drinks
- Easy grub – think burgers, salads, sandwiches, takeaway
- Something a little special – for entertaining new contacts
- A great pizza – it’s always a crowd-pleaser
Use Touch Stay’s Google Places integration to pull in crucial info quickly and easily.
Remember, not all your attendees will have cars, and some might not feel comfortable exploring an unfamiliar city on their own. Try to keep your recommendations within easy walking distance of your event venue.

8. Map out your event schedule
This is arguably the most essential section of your event app. After all, your visitors need to know what’s happening, and when!
We recommend including a separate category for each day of your conference. For example, if your event starts on Monday 12th September, and finishes on Wednesday 14th September, you would have three categories:
- Monday
- Tuesday
- Wednesday
Within each category, include one subcategory labelled with the full date of that day. This way, all your attendees know exactly where they can find the info they need for each day of your event.
From here, create a topic dedicated to each session. For example, if you’re kicking off your event with a welcome breakfast, you might create a topic titled: “9:00am | Welcome Breakfast”. Within the topic, you could expand on:
- Where attendees can find the breakfast
- Who will be hosting it
- When it will end
- The kind of food that will be served
Repeat this process for each new session, providing all the details your attendees need to plan out their time with you.
Check out this event app for the Texas B&B Association Annual Conference to see how your agenda might look.

9. Profile your event speakers
If you’re organising a conference, a summit, or an awards ceremony, you’re likely to have speakers and presenters whom you want to publicise. After all, if you’ve managed to nab the leading voices in your industry, you want people to know they’ll be there!
A category dedicated to your speakers devotes a space in your event app to all of the wonderful, knowledgeable speakers you’ve booked for your event.
Within this category, we recommend creating a topic for each speaker, containing their:
- Headshot
- Full name
- Title
- Bio
Give your speakers a place to shine, and show your attendees the value that you’re bringing them.

10. Showcase your event sponsorship
Dedicating a category to your event sponsors accomplishes a similar goal:
- Your sponsors gain exposure through your event app
- Attendees can browse a list of services endorsed by you
Your event app might even help you to attract more sponsors if they know that you create a space specifically for them.
Within this category, devote a topic to each of your sponsors, with higher level sponsors positioned towards the top. Within each topic, include (where applicable) a:
- Logo
- Description
- How/where to connect with them during the event
- Link to the sponsor’s website
- Contact details
11. Wave goodbye to event attendees
Your event app has guided attendees through every step of their time with you. Through it, you’ve answered questions before they even asked them and helped them to make the most of the area they’re visiting (perhaps they’ve discovered a new favourite restaurant!).
So, now is the time to solidify the relationship you’ve built with them. Thank them for coming, and tell them how they can stay in touch with your organisation.
Don’t forget to:
- Encourage attendees to connect with you on social media (and shout about what a great time they had!)
- Point them towards your email newsletter and membership sign-up
- Fill them in on any upcoming events, or plans you already have in place for next year’s event
Once you’ve created this final section, you’re ready to start sharing!
How to share your event app with attendees
Attendees access your Touch Stay digital event guide via a simple URL, making it super easy to start sharing your event mobile app. You’ve got three key options:
- Paste your guidebook Quick Share link into your current communications, giving attendees immediate, unlimited access to all your event information
- Use Touch Stay Memo to establish a communication schedule before, during, and after your event, serving attendees convenient and useful info at their fingertips
- Generate a QR code attendees scan at the event, directing them to the juicy details in your event app (and include it in all your booking confirmation comms along with a link to the event guide)
We recommend sharing your event app multiple times before, during, and even after your event. You can generate deep links to specific subcategories and topics, directing attendees straight to the info that’s most relevant to them. If you’ve already honed your messaging flow, simply insert your guidebook link into the emails and texts you’re already sending.
Sharing your mobile event app with Touch Stay Memo
If you’re looking to establish an effective, low-effort messaging flow, why not try Touch Stay’s scheduled notification system: Memo.
Memo allows you to create a series of message templates and input your attendees’ email addresses and mobile numbers. From here, it shares your guidebook link via email and SMS at intervals you choose. For example, you could set up a messaging flow that looks something like this:
- An email the week before the event, introducing attendees to your guide
- A text the day before the event starts, reminding them to add the guidebook to their home screen, with all the juicy check-in details
- A text the next morning, pointing visitors towards the welcome breakfast
- A lunchtime SMS, encouraging attendees to visit sponsors’ booths
- A text in the evening, highlighting local food recommendations
- An email after attendees leave, asking them to leave feedback and connect on their fave social networks
Once you’ve established your message templates and schedule, Memo will send each of these messages without you having to lift a finger. While you’re dealing with all the last-minute changes that every event sees, you’re not also having to field dozens of questions from confused attendees.
Nail your event communications with Touch Stay
A Touch Stay digital event management app is the blank slate for your event technology and communications. This walkthrough is just a starting point – with completely customisable categories, subcategories, and topics, you’re in control of your event information. Adapt the content and order of your guidebook to suit you.
With your venue, lodging, and local recommendations pinned to the Map tab of your guidebook, attendees will know exactly where to find you. The Info tab will tell them everything from who’s leading the round table discussion, to the meeting point for the evening get-together. Everything they need is right there, in their back pocket.
Touch Stay takes (most of) the stress out of your event planning. Plus, with a 14-day free trial, you can try us out free of charge (no credit card details required!). What are you waiting for?